> For the complete documentation index, see [llms.txt](https://gitbook.zenithwallet.com/llms.txt). Markdown versions of documentation pages are available by appending `.md` to page URLs; this page is available as [Markdown](https://gitbook.zenithwallet.com/miscellaneous/zenith-suite-of-tools/deploy-bot/create-token/tax-token.md).
# 💰Tax Token
Use this section as general reference to the "Create Token" process. The advanced section following this will show additional features that are not included in this basic creation.
## Tax Token
Once you click Tax Token, you'll be given the following prompts:
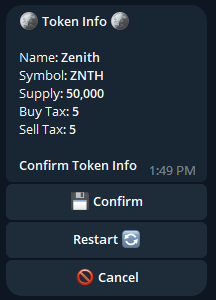
Decide your token name, symbol, total supply of tokens, as well as your buy and sell tax.
Buy and sell taxes will automatically occur on every transaction, and the fee's will route to your deploy wallet.
After you've defined the above, review your token and hit "confirm" if you wish to proceed.
Once you confirm, the following menu will pop up:
Select "Estimate Gas ⛽"
After you select "Yes 🚀" you will get a confirmation letting you know your token has been successfully deployed, along with a link to the created contract address.
Select any of the prompts to return to the main menu.
The following section will showcase the minor difference in the creation process should you select the advanced version instead.